www.flickr.com

Tom Greenthumb Gardening

Thursday, April 06, 2006

Windowsill Herb Garden - Build An Inexpensive Container

I recently planted some mint and chive herb seeds in individual potting cups that I'll transfer outside in a couple of months. I had some extra seeds. So, rather than letting them go to waste, I decided to create a windowsill herb garden. I had a plastic container from a recent batch of tomatoes I picked up at Costco that would work well for my project. Yes, even Greenthumb Tom has to purchase fresh tomotoes from the store when none are available in his garden.

I filled the plastic container with some soilless potting mix which would allow for decent drainage. The clear plastic container was the type with a folding top that snapped together on either side. There were about 15 tomatoes in it which I removed. I have a window that receives about 5 hours of sun a day. This became the perfect spot for my inexpensive windowsill herb garden. The potting mix filled the container about 2-3 inches deep.

I then planted the chive seeds in one half and the mint in the other. Herbs don't care for really wet soil so be sure to water them lightly. With the top of the container snapped closed it creates a mini greenhouse. The initial sprouts shoot up in no time at all. The best type of herbs for this are the low growing varieties such as chives, mint, parsley, or thyme. My inexpensive windowsill herb garden will soon provide handy ingredients to those baked potatotes or meat dishes. Try this yourself and receive the satisfaction of using fresh herbs you've grown yourself.
Wednesday, April 05, 2006

How to Grow Ginger in a Cold Climate

Last night I decided to cook up a stir fry. Ginger is definitely a key ingredient in this fast form of cooking. It not only acts as an anti-inflammatory and increases circulation, but this root is great with noodles. It adds that Asian flair to most Chinese dishes. Growing ginger outside is impossible if you live in a colder climate. Why not try growing ginger in a pot indoors?

I would suggest growing your ginger in a pot around 15 inches across and 12 inches in depth. You want to allow an adequate area for proper drainage. Pick up three ginger roots the next time you hit your local grocery. It's best to use those with an abundant amount of buds. Soak your ginger roots in luke-warm water for 24 hours. Place your tubers in enriched potting soil with the buds up.

If you begin growing this plant in the Spring, with temperatures over 60 degrees F, you can leave your pot outside. Ideal temperature for growing ginger root is over 75 degrees F. Water the ginger tubers lightly at first, increasing amounts as the ginger begins to grow.

In nine to twelve months you should have a ginger plant 3 to 4 feet tall. You can then enjoy home-grown "ginger root" in your favorite chinese dishes.

Monday, April 03, 2006

Oregano and Basil Dry Rub Spice Mix Recipe

Using two of my favorite herbs in a dry rub spice mix, creates an excellent herb recipe to liven up your next barbeque. This weeks featured herb, oregano, combined with a previous herb of the week, basil, makes one darn good dry rub.

You can use this herb recipe on your preferred meat. I've enjoyed it on chicken, pork, and beef. Here's the recipe:


  • 1 1/2 Tbsp salt

  • 1 tsp ground black pepper

  • 1 Tbsp garlic powder or dried garlic

  • 1 Tbsp onion powder or dried onion

  • 1 tsp dried oregano

  • 1 tsp dried basil

  • 2 Tbsp paprika

  • 1 tsp chile powder

  • 1/4 cup brown sugar


Combine spices and all ingredients in a bowl until mixed thoroughly. This will cover around 5 pieces of meat. You then work the dry herb rub into the meat. It's best left overnight in the refrigerator.

Cook the meat either in a crock pot for around 4 hours on low, or bake in the oven for 2 - 2 1/2 hours at around 275F. You can also use this on the barbeque. Turns out delicious!

Using this dry herb rub on your next meat dish is sure to be a hit with family or friends. Brag a little and let them know you're using herbs grown in your garden.

Sunday, April 02, 2006

Building a Deer Fence for the Deer Proof Garden

After recently speaking with my relatives about their use of whitetail deer repellents, I took part in building a deer fence for a friends basic herb garden. He's been having problems the last few years with these animals.

I mentioned to him that coyote urine may be a product he'd like to try. Deer can detect the smell of predator urine which deters them from entering the garden. The challenge is that it can wash off. He thought it would be best building a deer fence to protect his basic herb garden in addition to using the coyote urine.

The wireless deer fence sounded like a good way to deter the deer, but he's industrious and decided he'd try building a fence with posts instead. Bob had access to some 10 foot posts he knew would work well. A hot wire was installed two feet high, and monofilament fishing line spaced in foot increments. It turned out to be an inexpensive way to keep the deer out.

Bob used six posts and installed a small access door to his basic herb garden. The clear fishing line doesn't make the fence an unsightly obstruction. Building a deer fence was relatively easy for my friend. I hope you'll find a resolution to your deer problems too.

Saturday, April 01, 2006

Oregano - Herb of the Week - Oregano Mouthwash

Sometimes referred to as the "pizza herb", my herb of the week is oregano. This perennial produces greenish-gray leaves with purple and pink flowers in the summer. A perfect addition to the basic herb garden. I've used it as ground cover for an attractive effect. More commonly though, this herb is used in many culinary dishes with an Italian flair, such as pizza, tomato based sauces, eggplants, and meats.

Oregano seeds should be sewn outdoors in the spring after the last frost. Planting in a well-drained location will yield the best results. Space these plants 12 inches apart and wait for seed germination, which usually takes around 7 to 14 days. It's best to harvest these plants by cutting fresh leaves as needed or just before the flowers bloom.

While oregano tastes great on our favorite Italian dishes, it also has many medicinal uses, such as a cure for sinusitis or throat inflammation. For inflammation of the mouth and throat, an oregano based mouthwash will help alleviate the symptoms. In 1 1/2 cups of boiling water add 2 tablespoons of the dried herb or four tablespoons of the fresh oregano leaves. Cover and steep the mixture for 10 to 15 minutes. Strain off the remaining herbs and allow your mouthwash mixture to cool. Use this warm liquid to gargle three to five times daily.

Whether eaten on your favorite foods, or used for its practical medicinal values, oregano is a versatile plant that should be in any basic herb garden.

Friday, March 31, 2006

Kitchen Tip: Dry Your Own Herbs

If you're like me, sometmes you grow too many fresh herbs in the garden. Martha Stewart offers some great advice for drying a partial amount of the herbs.

'When you buy a bunch of fresh herbs and need only a bit, here's how to save the rest.

How It's Done
Wrap a piece of kitchen twine around the stems, creating a loop. Hang the bunch, upside down, in a cool, dry place. Most herbs will take from four to ten days to dry. Once they're crisp, pick leaves from stems, and place in a tightly sealed jar. Label and date.

Store in a cool, dark place; dried herbs will keep for about six months.

Note: Use this technique to dry sturdy herbs, such as rosemary, thyme, oregano, and sage.'

Read more at Kitchen Tip: Dry Your Own Herbs

Medicinal Uses of Oregano - Pizza, Lasagna, Spaghetti Sauce

While oregano is known to spice up favorite foods such as pizza, lasagna, and spaghetti sauce, the medicinal uses oregano offers are also quite valuable. A few of them include the following:

  • Alleviating Upset Stomach:
  • This may help after that third helping of lasagna.
  • Indigestion:
  • I know my homemade pizza is delicious, but you ate the whole thing.
  • Bloating and flatulence:
  • Mamas spaghetti sauce always does this to me.
  • Toothaches:
  • If you were eating more herbs and natural foods from the garden you might have avoided this problem altogether.
  • Coughing:
  • Be sure and bundle up when working in the garden on those colder days.
  • Antigungal Agents:
  • Oregano oil has been shown by researchers to be a much safer form of combat against fungus than some popular drugs.

I usually grow Greek oregano in my herb garden. This white-flowered variety offers a more flavorful, pungent taste to some of my favorite foods. It's actually best if this plant is harvested before the flowers are allowed to bloom. I've found that the leaves have their best flavor at this time of maturity. Drying the herb, rather than using it fresh, actually increases the intensity of flavor. I store mine in the refrigerator using the same method for drying as I do basil.

So the next time you eat too much pizza, you might remember some of the medicinal uses oregano brings us. Herbs can be utilized in a plethora of ways. Whether you're cooking, or curing an ailment, growing and using your own herbs is fun and rewarding.

Wednesday, March 29, 2006

Experience Colon Cleanse - Homemade Colon Cleanse

Using a medley of herbs grown in the basic herb garden, combined with other essential ingredients to experience colon cleanse regularly, is just one other way to stay healthy. The body needs natural foods to help the digestive system stay toxin free. Detoxification of the body using natural methods stimulates the colon and small intestines.

To experience colon cleanse on a regular basis I use the following basic recipe. Remember to consult with your physician before starting a homemade colon cleanse. The herbs I use have been grown in my garden and then dried.

Homemade Colon Cleanse Recipe


  • 2 ounces freshly pressed apple juice

  • 8 ounces water

  • 1 teaspoon dried fresh mint

  • 1 teaspoon dried or fresh basil

  • 1 teaspoon dried or fresh parsley

  • 1 tablespoon Bentonite clay

  • 1 teaspoon Metamucil


Mix the ingredients together and drink. The faster you do this the better, as the cleanse tends to solidify. Immediately after, drink 8 more ounces of water combined with 1 tablespoon vinegar, and 1 tsp. honey to cut the bitter taste. Drink plenty of fluids throughout the day.

It's been my experience, colon cleanse done regularly, promotes improved digestion, alleviates constipation, and keeps those harmful toxins from accumulating in the body. My energy level always increases after a refreshing colon cleanse. I hope the homemade colon cleanse boosts your energy levels too.

How to Grow Chamomile for the Basic Herb Garden


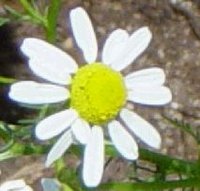
Chamomile is an excellent choice for the basic herb garden. It's dried flowers are used in tea and oils. There are two major varieties. German Chamomile, which is an annual that generally grows around 3 feet high. Roman Chamomile, the second variety, is a perennial which only grows to around five to 12 inches tall. I enjoy planting this type between decorative rocks, and placing them on a garden paths.

Planting chamomile can be done two basic ways in the herb garden. This plant is a reseeder, so scatter your seeds on top of the soil and they will naturally seed themselves. If you are planting actual plants however, choose ones that look healthy. A full set of leaves and no flowers is best. This allows growth focus on the roots.

The location for planting should have plenty of sun, and a good drainage system for the soil.

I sprinkle my seeds in the spring after the last frost. Usually the seeds are spread about 5 inches apart. Chamomile is also a spreader, so plan for that. Its an excellent ground covering plant.

Fertilize regularly and pick dead flowers as needed to allow new bloom growth.

This plant can really take off when it starts growing. Pruning a few times a month should easily keep it under control. The beautiful flowers produced will add a nice addition to your basic herb garden.